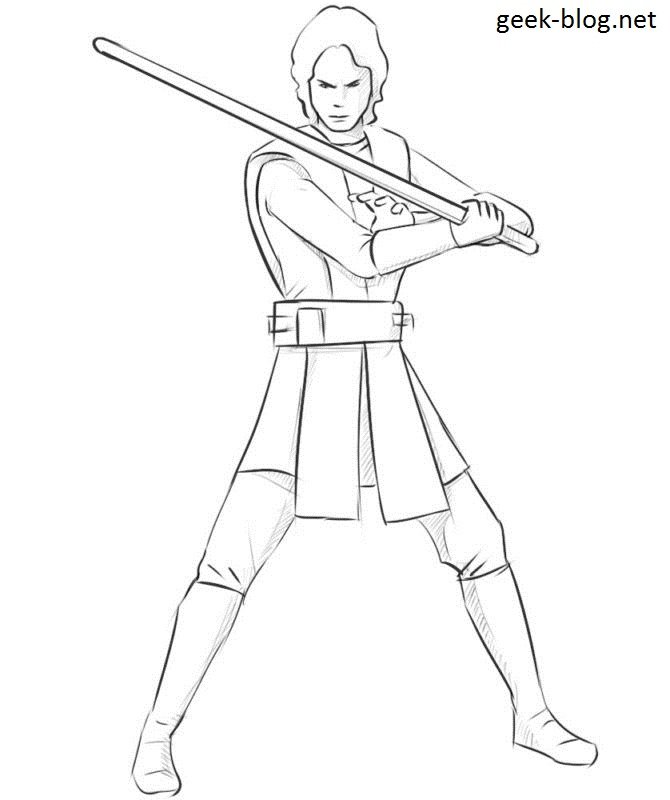
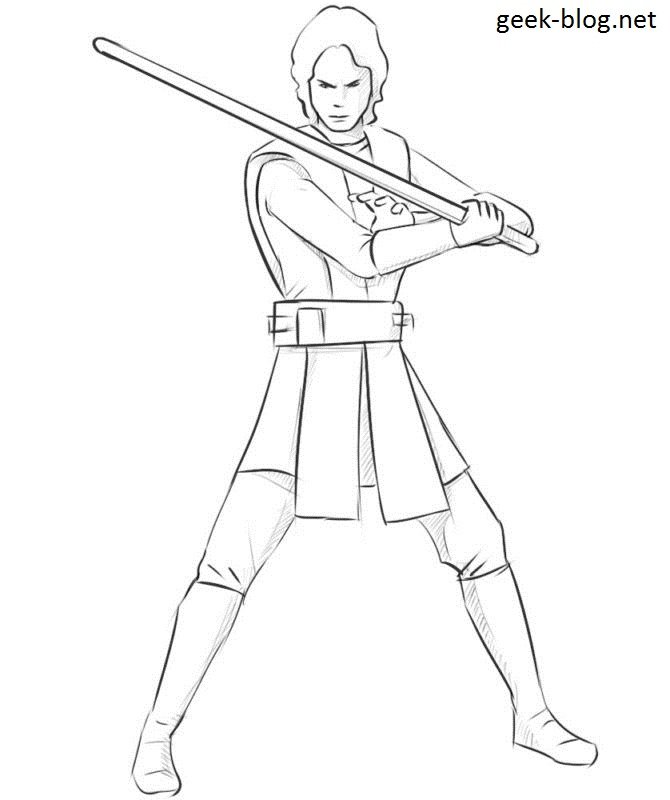
Hello! Today we will present you a drawing lesson in which we will show about how to draw Anakin Skywalker.
Step 1
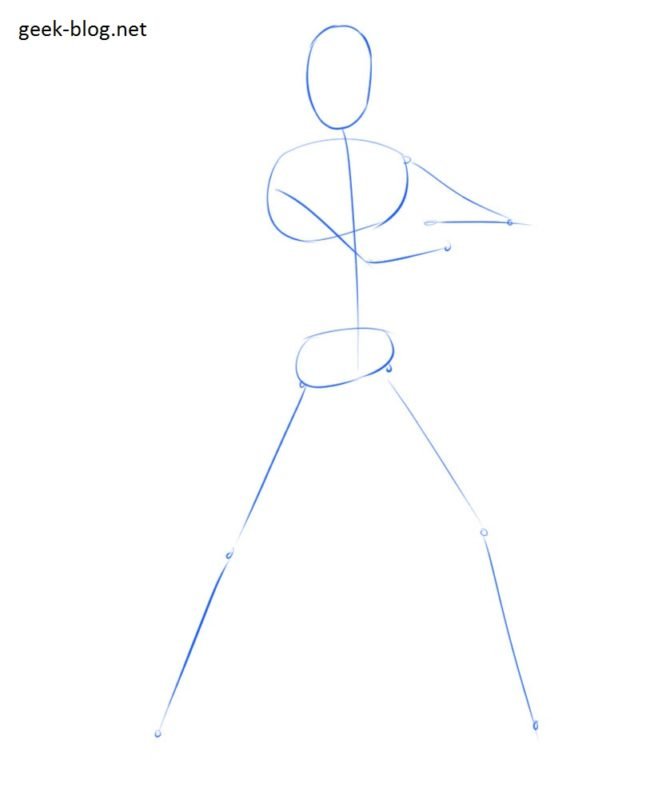
Firstly we draw a manikin. It consists of sticks and circles. We outline this manikin because it help to depict the basic features of the figure, as well as the pose and angle. We see the figure of a tall young man whose height is equal to the sum of the lengths of 7.5 goals. The chest is much wider than the pelvis. Our character is presented in a dynamic pose. His legs are wide apart and with his hands he squeezes his lightsaber.
Step 2
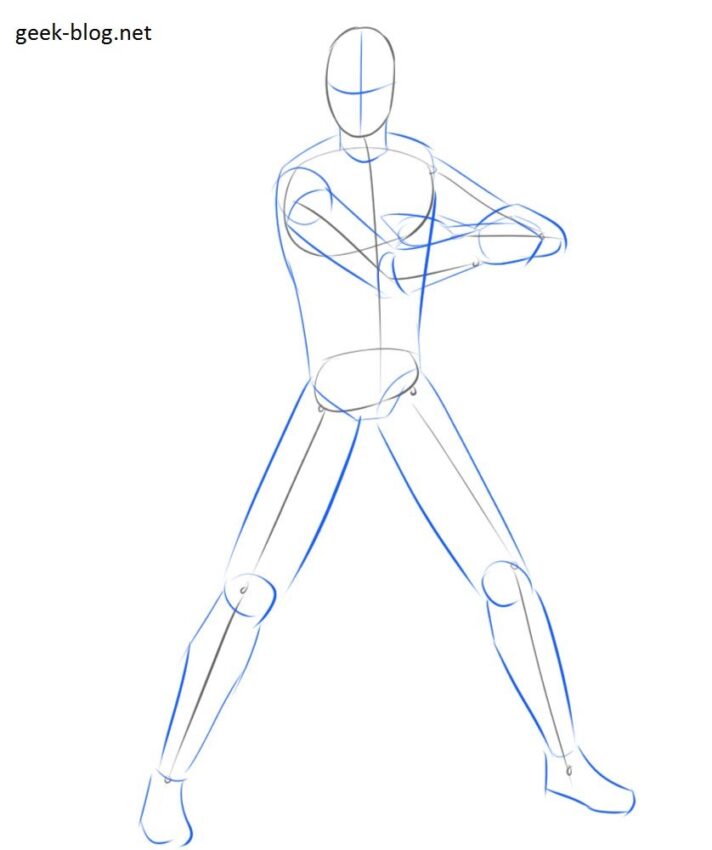
This is the second basic step in which we outline the contours of the parts of the body to get a three-dimensional silhouette. Here we connect the head and chest, and then the chest and pelvis. So we get the silhouette of the torso. After that, we should circle the limbs using cylinders with smooth bends.
Step 3
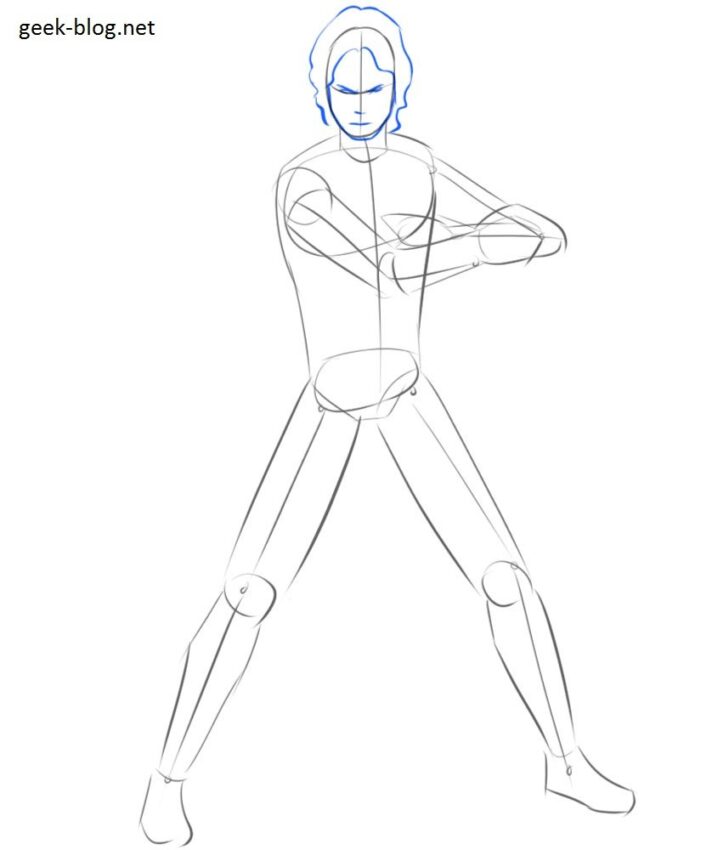
At this stage, we will depict the approximate contours of Anakin’s hairstyle and facial features. As you remember, our lord of the Sith has long, wavy hair. Facial features look like slightly curved dashes.
Step 4
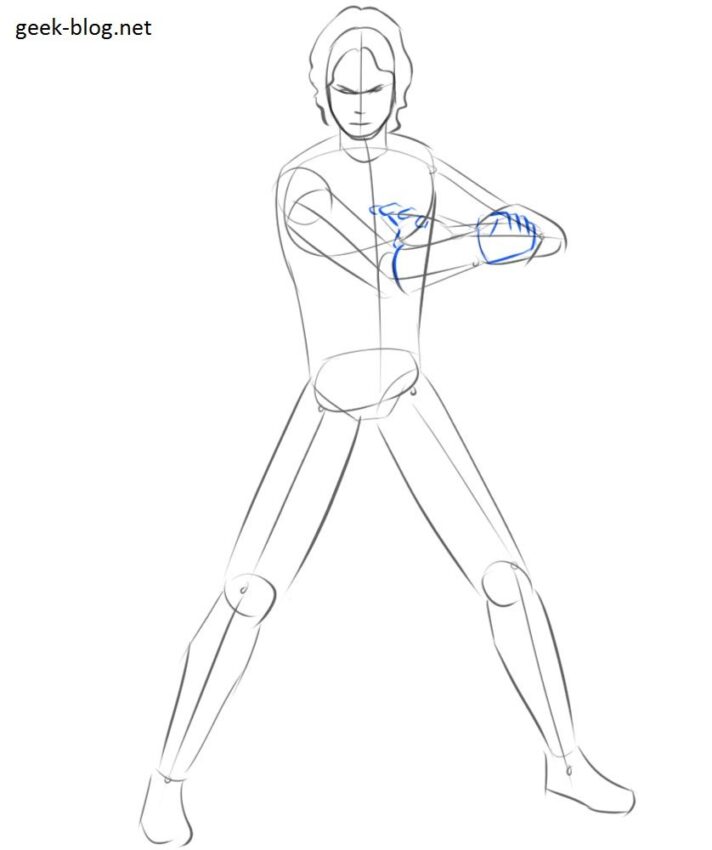
Let’s draw the hands. This is a very difficult moment actually. The right hand is clenched into a fist, and on the left hand the fingers are wide apart. Pay attention to the size and bend of each finger. Also check the location of the fingers relative to each other.
Step 5
Anakin is the lord of the Sith and he is very strong even without weapons. However, the lightsaber will not bother him, right? In this step, we will draw the outline of a lightsaber that has smooth, rounded edges and tapers slightly upward.
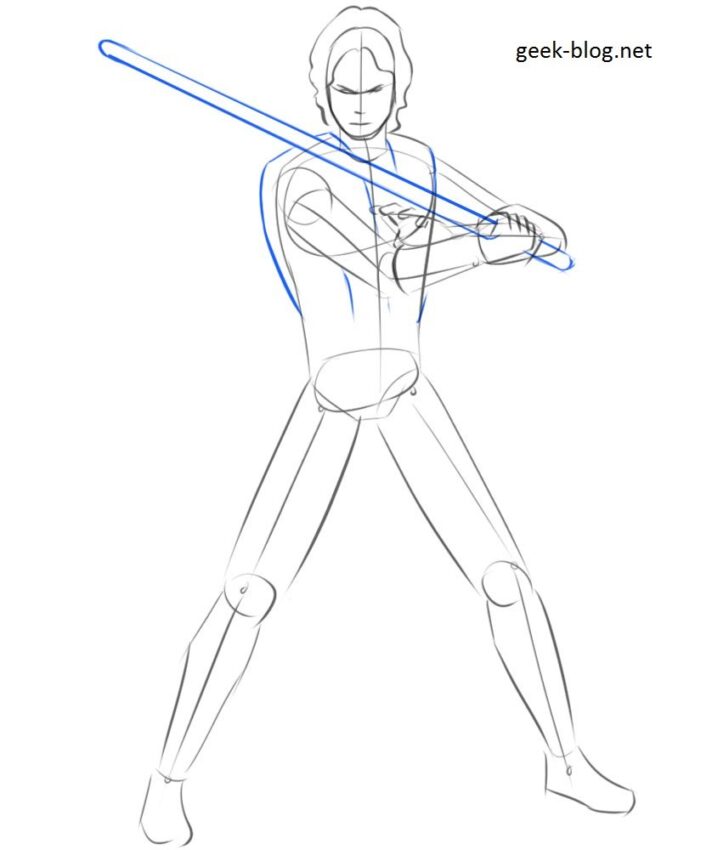
Step 6
In this step, we draw large rectangles that form the Jedi vestment belt. Note that the front rectangles differ in shape. Try drawing this step without using a ruler or other auxiliary tools.
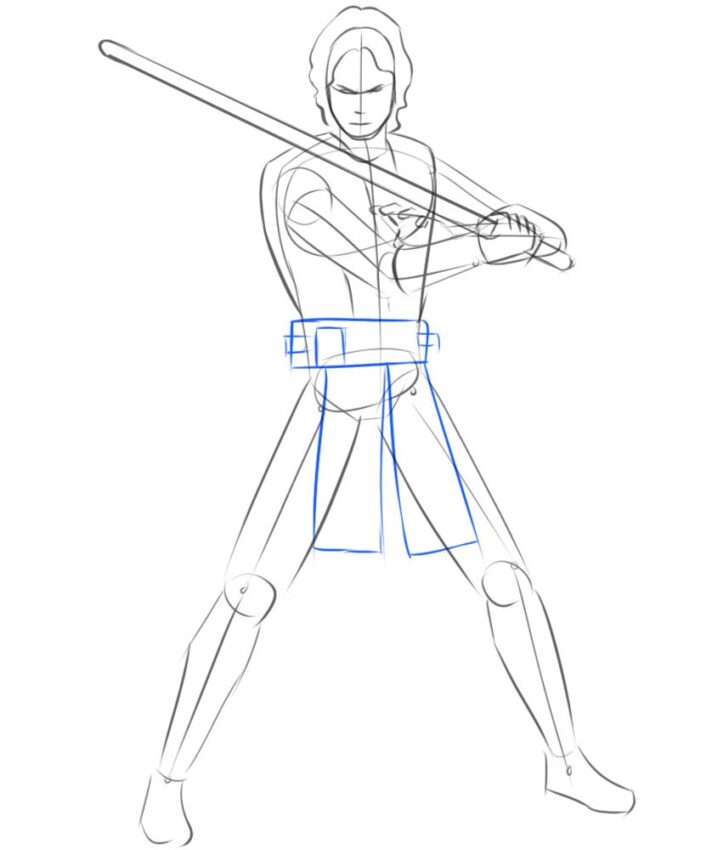
Step 7
This will be a very short step. Here we outline the contours of the pants, which are slightly wider than the contours of the legs from the second step. Just a couple of pleats on the fabric of your pants will make your pattern more lively.
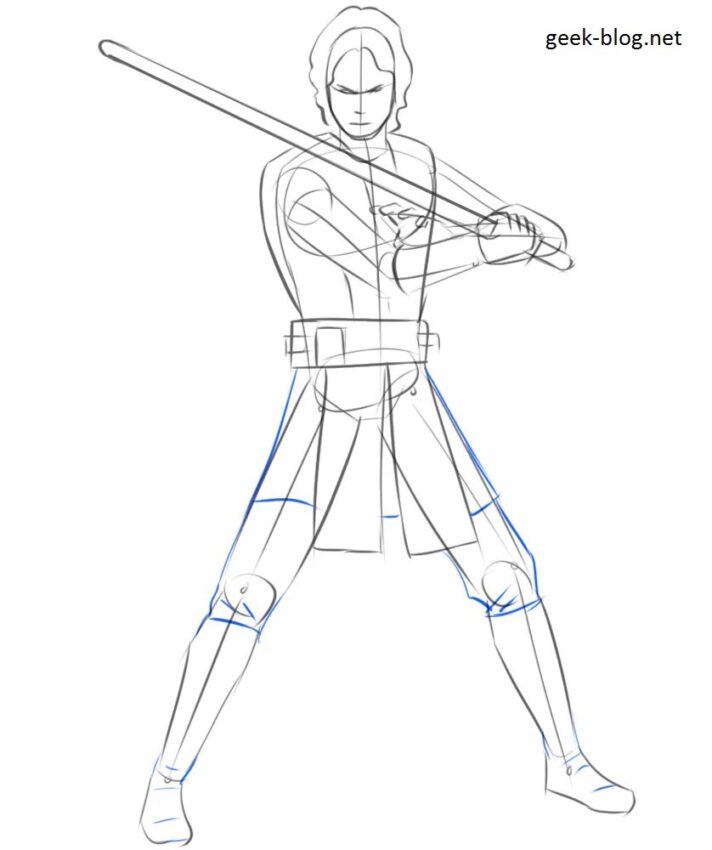
Step 8
We remove the extra guide lines. Check the whole picture for errors, wrong proportions or wrong lines. So we fix all the errors and move on to the final stage.
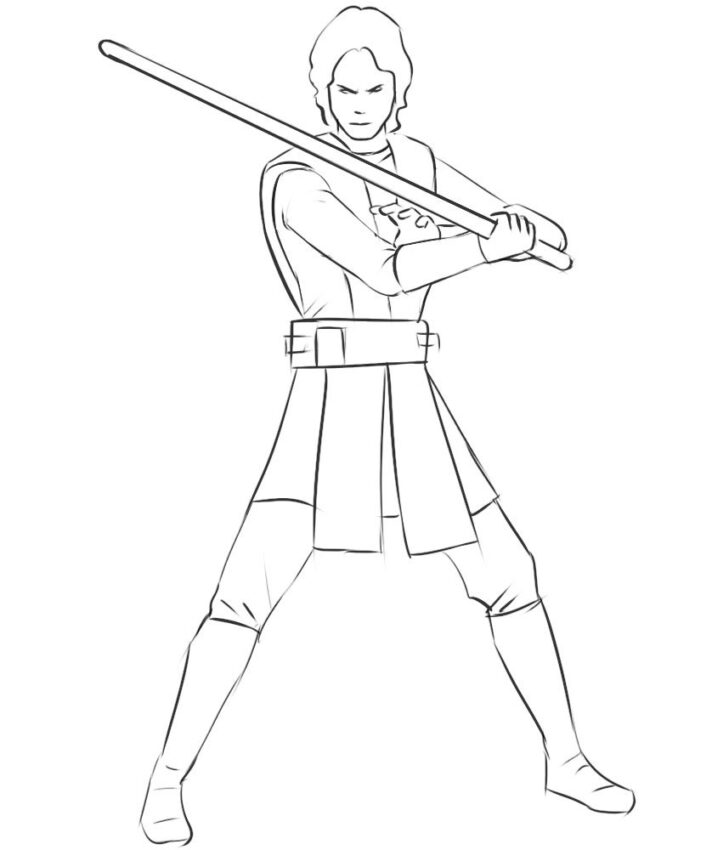
Step 9
Apply small shadows. It looks like a light hatch. You can first outline the boundaries of the shadow area and then cover it with a wide, light shading.
An avid gamer and owner of geek-blog.net, I immerse myself in the world of geek culture, from gaming to comics. Creator of the YouTube channel GameDigger, where I reveal the history of games and create exciting tops.

